
A heater can be scary—particularly when it's not working. In any case, there is uplifting news from heater repair masters. Approximately a fourth of all administration calls could be kept away from with simple fixes that cost nearly nothing or nothing. In this article, we'll center around the regular offenders and demonstrate to you what to do about them.
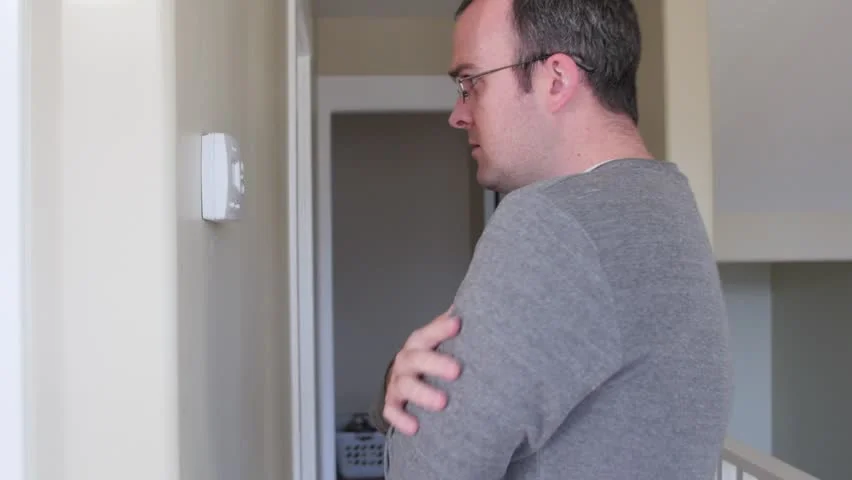
Before you accept you have a heater issue, check the indoor regulator to ensure it's really advising the heater to go ahead. Indoor regulators, particularly programmable ones, cann be entangled, and the more alternatives an indoor regulator has, the more that can turn out badly.
Do beyond any doubt the switch is on "Warmth" as opposed to on "Cool."
Check the temperature setting.
Contrast the temperature setting with the room temperature. Set the temperature five degrees higher than the room temperature and check whether the heater kicks on.
Ensure the program is showing the correct day and time, and additionally a.m. furthermore, p.m. settings.
Follow the indoor regulator wires back to the heater to check for breaks, particularly on the off chance that you've done any rebuilding as of late. In the event that you discover a break in one of the thin wires, join the line back together and wrap it with electrical tape.
Supplant the battery. On the off chance that you have a power blackout with a dead battery, you'll lose your settings and the indoor regulator will return to the default program.
Open the indoor regulator and delicately victory any tidy or trash. Ensure it's level and solidly connected on the divider, and that none of the wires coming into it are free.
On the off chance that you can't influence the program settings to work, you can sidestep them through and through. Basically punch in the temperature you need with the up/down control and afterward press the hold catch. That will switch on the heater if the indoor regulator writing computer programs is the issue.
Arrangement 2: Check shutoff switches and breakers
It sounds mind blowing, however heater experts regularly find that the main 'repair" a heater needs is to be turned on. Search for a standard divider switch on or close to the heater—all heaters, regardless of what age or sort, have one some place. Check the electrical switch or wire for the heater too. Ensure the front board covering the blower engine is safely secured—there's a push-in switch under it that must be completely discouraged for the heater to work.
Arrangement 3: Change channels
Filthy channels are the most well-known reason for heater issues. Clean and earth limit wind stream—and if the channel gets excessively obstructed, the warmth exchanger will overheat and stop too rapidly, and your home won't warm up. In the event that the blower is running yet no warmth is turning out, supplant the channel. A grimy channel additionally causes sediment development on the warmth exchanger, lessening the proficiency of the heater and shortening its life.
The proprietor's manual shows where the channel is and how to evacuate it. Change cheap level channels at any rate once every month. Ensure that the bolt indicates the heater. Examine creased channels once per month. Hold them up to the light and on the off chance that you can't see the light unmistakably through them, supplant them. Producers say creased channels are useful for three months, however transform them all the more as often as possible in the event that you have pets, children or create bunches of tidy.
Alert!
Continuously kill the shutoff switch (see Solution 2) and kill the indoor regulator or the distance down before changing the channel or dealing with the indoor regulator or heater.
Arrangement 4: Make beyond any doubt the gas is on
Similarly as with switches, somebody may have killed a gas valve and afterward neglected to walk out on. Follow the gas line back from the heater to the meter, and on the off chance that you see a handle that is opposite to the gas pipe, turn it so it's parallel. On the off chance that you have an old heater or evaporator, you may have a pilot light. Expel the front board and the burner cover and check to ensure it's lit.
Arrangement 5: Make beyond any doubt the fireplace debilitate pipe is clear
Drawn by the glow, flying creatures now and again fall into the smokestack debilitate pipe. Kill the heater and the indoor regulator the distance down, at that point destroy the conduit where it leaves the heater and check for flotsam and jetsam. Make certain to reassemble the segments in a similar request and heading that you took them out.
Arrangement 6: Flush out deplete lines
High-productivity heaters can deplete off a few gallons of water a day in warming season. In the event that the deplete lines end up limited by dregs or shape development, the heater will close down. On the off chance that the deplete hose looks messy, evacuate the hose, fill it with a blend of dye and water (25 percent blanch), at that point flush it following a few minutes.
Arrangement 7: Look for blocked or broken conduits that can confine wind current
On the off chance that your heater goes ahead yet maybe a couple rooms are cool, first ensure all the room registers are open. At that point analyze any ventilation work you can gain admittance to and search for holes between areas or fanning focuses. Seal any holes between segments of pipe with extraordinary metal channel tape. Try not to utilize standard fabric conduit tape—it rapidly crumbles, and it might likewise make pipes spill on the off chance that it was utilized to seal segments before.
Likewise check for handles distending from the ventilation work. These are dampers or aeration and cooling system sidesteps—ensure they're open.
Arrangement 8: Clean away leaves and flotsam and jetsam from warm pumps or admission and fumes vents.
On the off chance that you have a heater that vents out the side of the house, ensure nothing is hindering the admission or fumes. On the off chance that both of the channels is secured with screen work (like window screen), supplant it with 1/2-in.- work equipment material. On the off chance that ice is obstructing one of the funnels, you have a more serious issue some place in the framework. Tidy it up and get a specialist to discover why it's occurring.
In the event that you have a warmth pump, gather up grass and leaves from the blades of the open air compressor unit. Before warming season begins, hose it down delicately from the best to flush earth and flotsam and jetsam out of the lodging.
Extra Information
Figure A: 8 Things to Check Before You Call a Repair Service
Figure A1: High Efficiency Furnace
Required Tools for this Project
Have the vital apparatuses for this DIY venture arranged before you begin—you'll spare time and dissatisfaction.
4-in-1 screwdriver
Required Materials for this Project
Stay away from a minute ago shopping trips by having every one of your materials prepared early. Here's a rundown.
1/2-in.
Blanch
Electrical tape
Heater channel
Equipment material
Metal thwart channel tape